Welcome to Prints of Joy
Explore printable PDFs you can download and print at home. Discover paper crafts, printable gifts, recipe cards, vintage floral printables, and creative DIY projects.

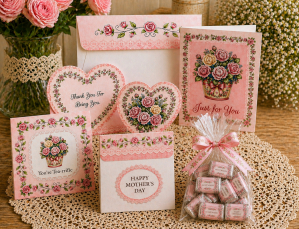
Newest Printable Release
Discover our newest printable collection, Roses in Bloom, a romantic vintage floral printable kit filled with greeting cards, envelopes, gift packaging, decorative paper crafts, and beautifully coordinated printable designs perfect for crafting, gifts, journaling, and creative decorating.