How to Add and Attach Text to Your Printable in Cricut Design Space
This tutorial shows you how to add text to your printable image in Cricut Design Space, change it to Print Then Cut, and attach it correctly so everything prints and cuts on the same mat. These same steps also apply when working with SVG cut files for Cricut projects.
Step 1: Upload Your Image or SVG File
Start by uploading your image or SVG file to your canvas. If you need help uploading, follow this guide: Upload Your Image Tutorial.
If you are working with SVG templates, you may find these helpful: SVG Cut Files Template, Cutting Files Overview, Pattern Cutting Files, and SVG Treat Box Template.
Step 2: Add Text
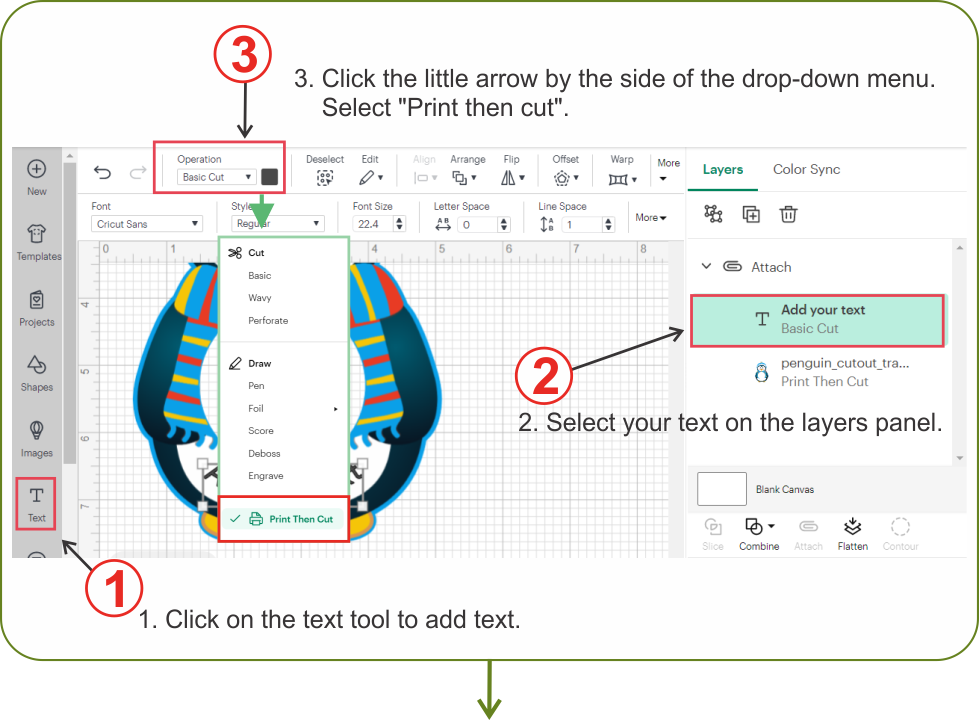
Click on the Text tool on the left panel in Cricut Design Space. Type your desired message. This feature includes many font and formatting options you can explore.
Before cutting, make sure your text is set to "Print Then Cut" — otherwise Cricut will cut the letters instead of printing them.
Step 3: Change Operation to Print Then Cut
1. Click on your text layer in the Layers panel.
2. Look at the top left corner of Design Space where it says "Operation".
3. Click the drop-down arrow and select "Print Then Cut".
Step 4: Attach Text to Image or SVG
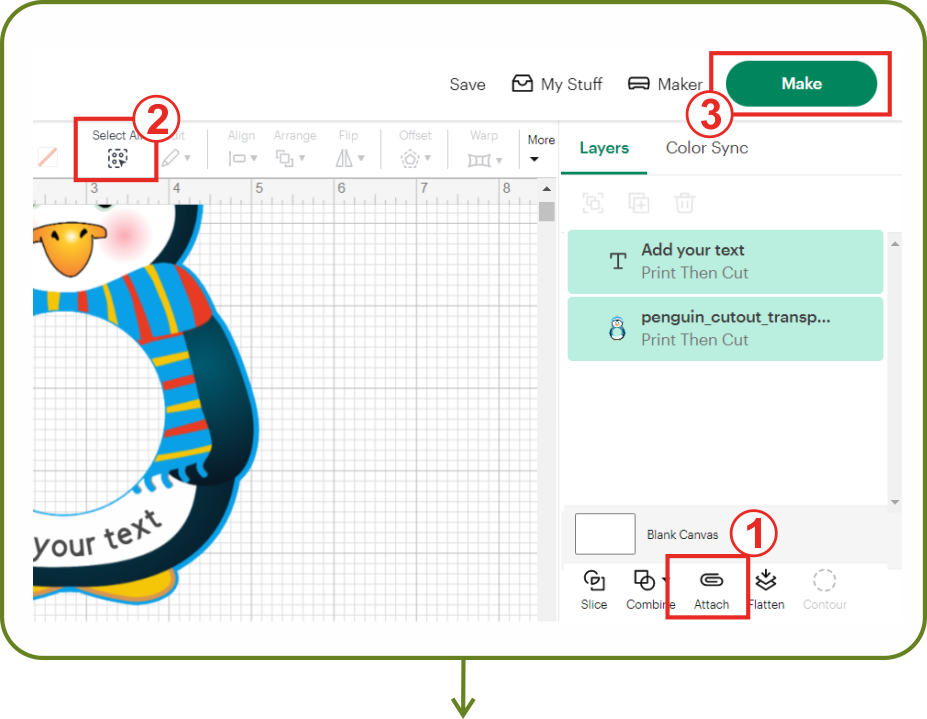
4. Click "Select All".
5. Then click "Attach". This ensures the text and image (or SVG design) print or cut together on one mat.
6. Click "Make It" in the top right corner to continue.
This method works for printable PDF files as well as layered SVG designs. When working with SVG cut files, always attach or weld elements as needed before cutting to ensure proper alignment.
If you are customizing printable PDF files or SVG gift boxes, wrappers, and treat packaging from the Printables Club, these steps will help you personalize your projects quickly and correctly.