Printables & SVG Templates
How to Use Intricate Designs with an SVG Template
I am sharing what works for me, but I am not an expert in cutting machines.
Some printables are complicated to cut because of detailed lines that must be cut and scored. For these designs, it is best to use an SVG template for cutting instead of relying only on Print Then Cut.
Download the Example Files
Important: Print Then Cut Calibration
Before starting, calibrate your machine for Print Then Cut. You only need to do this once.
Step-by-Step Instructions
STEP 1 – Start a New Project
Open Cricut Design Space and click New Project.
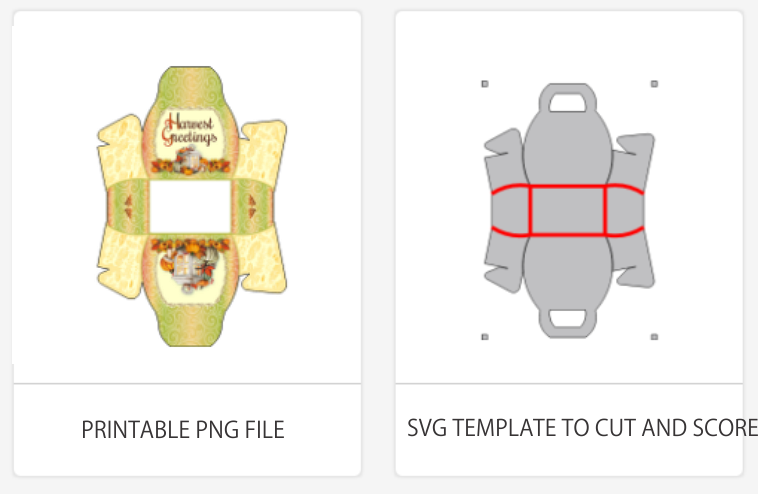
STEP 2 – Upload the Printable PNG
- Click Upload.
- Select Upload Image.
- Click Browse and choose your PNG file.
- Select Complex and click Continue.
- Choose Print Then Cut Image and upload.
STEP 3 – Upload the SVG File
- Click Upload again.
- Select your SVG file.
- Click Upload.
STEP 4 – Add Both Files to Canvas
Select both files in Recent Uploads and click Add to Canvas.
STEP 5 – Prepare the SVG File
- Select the score line layer in the Layers panel.
- Change Operation to Score.
- Select all SVG layers and click Attach.
STEP 6 – Resize the Printable PNG
- Select the PNG layer.
- Keep the padlock locked.
- Set the width (example: 6.51 inches).
STEP 7 – Make It
- Click Make It.
- Mat 1 will be the Print layer.
- Mat 2 will be the Cut and Score layer.
Print Settings
Turn Bleed On before printing to avoid white edges.
Cut and Score
Load your printed sheet onto the cutting mat and press the flashing Go button.
Cricut Explore and Venture machines can hold the scoring stylus and blade at the same time. For Cricut Maker, choose the scoring stylus under Edit Tools.